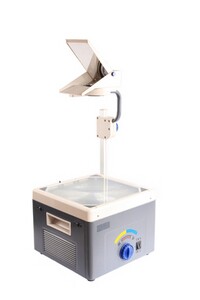
In The Overhead Projector: Don’t Overlook It (Part 1), I explained why it’s better to use a projector (be it an old-fashioned overhead or LCD) than to write on the board.

Now we turn to how to use a projector, which might seem pretty straightforward: just flip it on and you’re ready to go. Yet as with any teaching technique, there are things to do when using a projector in order to realize its full potential:
- Operate the on-off switch actively. A typical class period involves a series of transitions, each requiring students to redirect their attention--from the overhead screen to a classmate, from a classmate to you, from you to the textbook, from the textbook back to the overhead screen, and so on. You can facilitate many of these transitions by making sure the projector is on when it should be on, and off (or covered or switched to a blank screen when using an LCD Projector) when it should be off. As a rule, only have the projector on when you want students to read, record, or refer to what’s on the screen. This may sound simple, but not when you consider how spontaneous some transitions are. Imagine, for example, you’re presenting a lesson using the projector when a student asks a question that goes beyond the point currently being addressed. Still, it’s a question--as most of students’ questions are--that deserves your and the entire class’ attention. It’s important, therefore, to shut off the projector to avoid dividing students’ attention between your response and what’s on the screen. By actively managing the on-off switch like this, you’ll establish a non-verbal cue telling students where their attention should be at any given time.
- Use a cover sheet. When presenting lessons on the projector, use a cover sheet (or fade-in feature if you’re using PowerPoint or an interactive whiteboard) to keep students focused on the point you’re currently discussing. If, for example, I were presenting this list of tips using a conventional projector, I would begin with a sheet of paper covering the entire list except item #1, and would slide the paper down to reveal item #2 only after concluding the discussion of #1.

- Prepare notes on the computer. In The Overhead Projector: Don’t Overlook It (Part 1), I wrote that one of the benefits of using a projector is that you can store and reuse your notes. Still, it’s inevitable you’ll need to edit your notes from year to year. To make it easy to do so, and to make your notes as legible as possible, type and save your lessons on a computer instead of writing them out by hand. (Note: be sure to use a font size students can read easily on the overhead screen--22 is about right for most fonts.)
- Preserve original notes by using overlays. Even when you prepare notes on transparencies ahead of time, you’ll often need to add to them during lessons. (I, in fact, omit key information on purpose, prompting students to come up with the missing information, which I then fill in on the projector.) In such cases, you’ll need to restore your transparencies to their original state before presenting the same lesson to another class. Unfortunately, as you wipe off what you added, you risk wiping off (or smudging) your original notes too. Guard against this by taping a blank transparency over your pre-printed transparency, allowing you to write over your original notes instead of directly onto them.
- Store extra bulbs. The more you rely on the projector, the more lost you’ll be without it, so always keep a spare light bulb on hand. (Better yet, if you’re using a conventional projector, get one that houses two bulbs so that all you have to do is flip a switch to activate the second bulb if the first one burns out.)
- Use a cart. Keep your projector on a cart rather than on a desk. Not only so you can roll it out of the way when you’re not using it, but also because your cart can double as an organizational center (e.g., I kept each day’s handouts in heavy duty file folders, one per class, taped to the sides of the cart).
Do these things and you’ll agree that using an overhead projector is a key to maximizing instructional time and effectiveness. So don’t overlook it.
Top image by Chuyu; bottom image by Sevkovichnya (both provided by Dreamstime license)
